Arduino virtual pet: build a pocket pet on an SSD1306 OLED
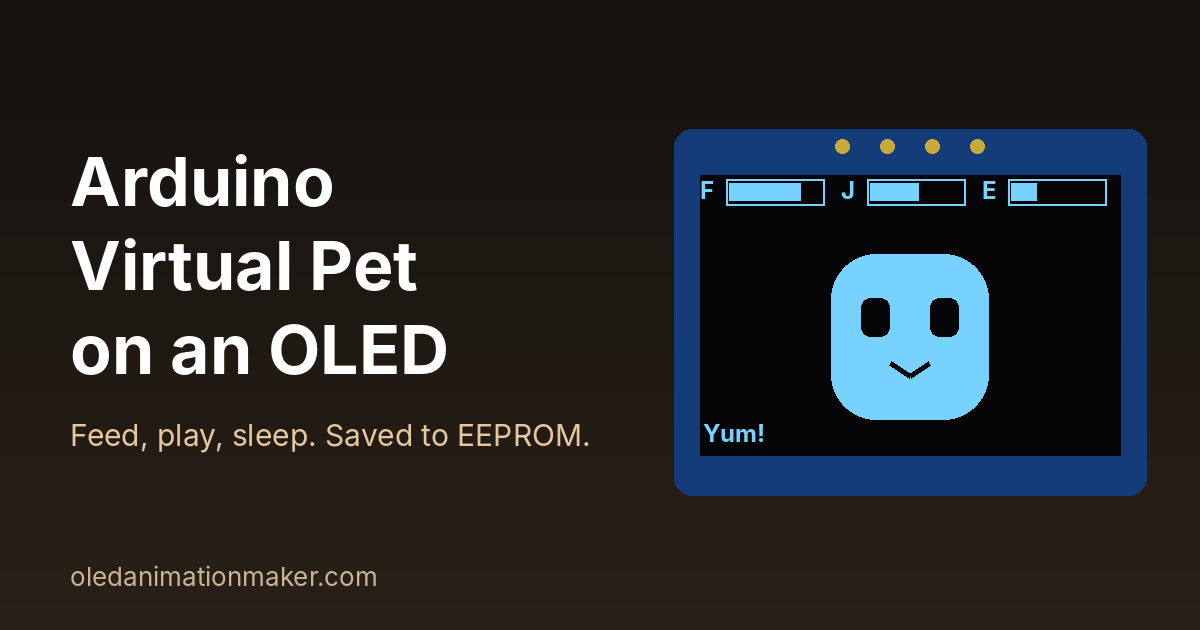
This guide shows you how to build an Arduino virtual pet on a 0.96 inch SSD1306 OLED with three buttons. The pet gets hungry, bored and tired as real time passes. You feed it, play with it and turn the lights off so it can sleep. Its face changes with its mood, it blinks, and it remembers everything after you unplug it. The same sketch runs on an Arduino Uno, an ESP32 or a Raspberry Pi Pico.
Pocket pets are one of the most shared maker builds this year. New open-source versions keep appearing on GitHub, Hackster and Instructables, often in a 3D printed egg-shaped case. This one is a single sketch you can read in ten minutes and change in an evening.
Quick answer. Wire an SSD1306 OLED to the I2C pins and three buttons to GND. Install Adafruit SSD1306 and Adafruit GFX, then upload the sketch below. Once a minute it lowers the food, joy and energy stats, and the Feed, Play and Sleep buttons raise them again. The pet is saved to EEPROM every ten minutes and when it goes to sleep.
How the virtual pet works
A virtual pet is a small program that keeps a few numbers about a creature and shows them as a face. Our pet has three stats, each from 0 to 100:
| Stat | On screen | Goes down when | Goes up when |
|---|---|---|---|
| Food | F bar | Every minute, faster while awake | You press Feed (+25) |
| Joy | J bar | Every minute while awake | You press Play (+20) |
| Energy | E bar | Every minute awake, and when it plays | It sleeps (+4 a minute) |
The face reads the stats. Low food or joy turns the smile into a frown. Low energy makes the eyes half shut. When the pet sleeps, the eyes close, "z Z" appears and the screen dims. It wakes on its own when energy reaches 100.
The pet never dies. When a stat drops below 15, it beeps once a minute to ask for help. That keeps it friendly for kids.
What you need for this Arduino virtual pet
| Part | Notes | Rough price (US) |
|---|---|---|
| Board | Arduino Uno or Nano, any ESP32 dev board, or a Raspberry Pi Pico / Pico 2 | $5 to $28 |
| OLED | 0.96 inch SSD1306, 128x64, I2C (4 pins) | $4 to $8 |
| Push buttons | Three 6 mm or 12 mm tactile buttons | Under $1 |
| Passive buzzer | Optional, for beeps | Under $1 |
| Breadboard and jumper wires | For testing before you solder | $5 |
A passive buzzer needs a changing signal to make sound, which is what tone() sends. An active buzzer
only gives one fixed beep, so pick passive. If this is your first OLED project, read the
Arduino OLED display tutorial for the SSD1306 first.
It explains the screen in more detail.
Wiring the OLED and three buttons
I2C is the two-wire bus the screen talks on. SDA carries the data and SCL carries the clock. The sketch uses each board's default I2C pins, so you do not set them in code.
| Connection | Arduino Uno / Nano | ESP32 dev board | Raspberry Pi Pico |
|---|---|---|---|
| OLED VCC | 5V | 3V3 | 3V3(OUT), pin 36 |
| OLED GND | GND | GND | GND |
| OLED SDA | A4 | GPIO 21 | GP4 |
| OLED SCL | A5 | GPIO 22 | GP5 |
| Feed button (other leg to GND) | D2 | GPIO 13 | GP13 |
| Play button (other leg to GND) | D3 | GPIO 14 | GP14 |
| Sleep button (other leg to GND) | D4 | GPIO 27 | GP15 |
| Buzzer + (other leg to GND) | D8 | GPIO 25 | GP16 |
The buttons need no resistors. The sketch turns on each pin's internal pull-up resistor, which holds the pin HIGH. A press connects the pin to GND, so it reads LOW. On a four-leg tactile button, use two legs on opposite corners. Legs on the same side are often joined inside, and the button then reads as always pressed.
Most SSD1306 modules sold on Amazon US accept 3.3 V or 5 V. If your listing does not say so, use 3.3 V.
Install the libraries
- Open the Arduino IDE and go to Sketch → Include Library → Manage Libraries.
- Search for Adafruit SSD1306 and click Install.
- When it asks about dependencies, click Install All. That adds the Adafruit GFX Library, which does the drawing.
- For an ESP32, add the Espressif esp32 core in Boards Manager. For a Pico, add Earle Philhower's Raspberry Pi Pico/RP2040 core.
Wire and EEPROM come with every board core. The official
Adafruit SSD1306 library on GitHub
lists the drawing and dim() functions the sketch uses.
The complete virtual pet sketch
Copy the whole sketch into a new file. The lines you may need to change are near the top: the OLED address, the
pins and the speed of the pet. The #if lines pick the right pins for your board when you compile.
// OLED virtual pet for SSD1306 128x64 (I2C)
// Boards: Arduino Uno/Nano, ESP32, Raspberry Pi Pico (arduino-pico core)
#include <Wire.h>
#include <Adafruit_GFX.h>
#include <Adafruit_SSD1306.h>
#include <EEPROM.h>

#define OLED_ADDR 0x3C            // change to 0x3D if your module uses it

// ---- Pins: change these to match your wiring ----
#if defined(ESP32)
const uint8_t BTN_FEED = 13, BTN_PLAY = 14, BTN_SLEEP = 27, BUZZER_PIN = 25;
#elif defined(ARDUINO_ARCH_RP2040)
const uint8_t BTN_FEED = 13, BTN_PLAY = 14, BTN_SLEEP = 15, BUZZER_PIN = 16;
#else
const uint8_t BTN_FEED = 2, BTN_PLAY = 3, BTN_SLEEP = 4, BUZZER_PIN = 8;
#endif
const bool USE_BUZZER = true;     // set to false if you have no buzzer

// ---- Pet tuning: how fast it gets hungry, bored and tired ----
const unsigned long TICK_MS = 60000UL;     // stats change once a minute
const unsigned long SAVE_MS = 600000UL;    // save every 10 minutes
const uint8_t FOOD_DROP = 2;   // per tick while awake (100 to 0 in about 50 min)
const uint8_t FUN_DROP = 2;
const uint8_t ENERGY_DROP = 1;
const uint8_t ENERGY_GAIN = 4; // per tick while asleep

Adafruit_SSD1306 display(128, 64, &Wire, -1);

struct Pet {
  uint8_t marker;      // 0x51 means "a pet is saved here"
  uint8_t food;        // 0 to 100
  uint8_t fun;
  uint8_t energy;
  uint8_t asleep;      // 1 = lights off
  uint32_t ageMin;     // minutes the pet has been switched on
};
Pet pet;

unsigned long lastTick = 0, lastSave = 0, lastBlink = 0, msgUntil = 0;
unsigned long blinkGap = 4000;
bool blinking = false;
const char *msg = "";

// ---- Buttons: INPUT_PULLUP, pressed = LOW ----
struct Button { uint8_t pin; bool last; unsigned long changed; bool stable; };
Button buttons[3] = {
  {BTN_FEED, HIGH, 0, HIGH}, {BTN_PLAY, HIGH, 0, HIGH}, {BTN_SLEEP, HIGH, 0, HIGH}
};

bool pressed(Button &b) {           // true once per press, debounced
  bool r = digitalRead(b.pin);
  if (r != b.last) { b.last = r; b.changed = millis(); }
  if (millis() - b.changed > 20 && r != b.stable) {
    b.stable = r;
    return r == LOW;
  }
  return false;
}

void beep(int freq, int ms) {
  if (USE_BUZZER) tone(BUZZER_PIN, freq, ms);
}

uint8_t addClamp(uint8_t v, int d) {   // keep stats between 0 and 100
  int r = v + d;
  if (r < 0) r = 0;
  if (r > 100) r = 100;
  return (uint8_t)r;
}

// ---- Save and load ----
void savePet() {
  EEPROM.put(0, pet);
#if defined(ESP32) || defined(ARDUINO_ARCH_RP2040)
  EEPROM.commit();                  // ESP32 and Pico keep EEPROM in flash
#endif
}

void loadPet() {
#if defined(ESP32) || defined(ARDUINO_ARCH_RP2040)
  EEPROM.begin(64);
#endif
  EEPROM.get(0, pet);
  if (pet.marker != 0x51 || pet.food > 100 || pet.fun > 100 || pet.energy > 100) {
    pet = {0x51, 80, 80, 80, 0, 0};   // new pet
    savePet();
  }
}

void say(const char *text) {
  msg = text;
  msgUntil = millis() + 2000;
}

// ---- Actions ----
void feed() {
  if (pet.asleep) { say("Zzz..."); return; }
  if (pet.food > 90) { say("I'm full!"); pet.fun = addClamp(pet.fun, -5); beep(300, 120); return; }
  pet.food = addClamp(pet.food, 25);
  say("Yum!");
  beep(880, 80);
}

void play() {
  if (pet.asleep) { say("Zzz..."); return; }
  if (pet.energy < 15) { say("Too tired"); beep(300, 120); return; }
  pet.fun = addClamp(pet.fun, 20);
  pet.energy = addClamp(pet.energy, -10);
  pet.food = addClamp(pet.food, -5);
  say("Wheee!");
  beep(1320, 60);
}

void toggleSleep() {
  pet.asleep = !pet.asleep;
  display.dim(pet.asleep);          // dim the screen at night
  say(pet.asleep ? "Good night" : "Morning!");
  savePet();
}

void tick() {                       // runs once per TICK_MS
  pet.ageMin++;
  if (pet.asleep) {
    pet.energy = addClamp(pet.energy, ENERGY_GAIN);
    pet.food = addClamp(pet.food, -1);
    if (pet.energy == 100) { pet.asleep = 0; display.dim(false); say("Morning!"); }
  } else {
    pet.food = addClamp(pet.food, -FOOD_DROP);
    pet.fun = addClamp(pet.fun, -FUN_DROP);
    pet.energy = addClamp(pet.energy, -ENERGY_DROP);
  }
  if (pet.food < 15 || pet.fun < 15) beep(660, 40);   // a small call for help
}

// ---- Drawing ----
void drawBar(int x, const char *label, uint8_t value) {
  display.setCursor(x, 0);
  display.print(label);
  display.drawRect(x + 8, 1, 30, 6, SSD1306_WHITE);
  display.fillRect(x + 9, 2, (value * 28) / 100, 4, SSD1306_WHITE);
}

void drawPet() {
  const int cx = 64, cy = 36;
  display.fillRoundRect(cx - 24, cy - 18, 48, 38, 14, SSD1306_WHITE);   // body
  bool sad = pet.food < 25 || pet.fun < 25;
  bool tired = pet.energy < 25;
  if (pet.asleep || blinking) {                       // closed eyes
    display.drawFastHLine(cx - 15, cy - 4, 9, SSD1306_BLACK);
    display.drawFastHLine(cx + 6, cy - 4, 9, SSD1306_BLACK);
  } else {
    int h = tired ? 4 : 9;                            // sleepy eyes are half shut
    display.fillRoundRect(cx - 15, cy - 8, 9, h, 3, SSD1306_BLACK);
    display.fillRoundRect(cx + 6, cy - 8, 9, h, 3, SSD1306_BLACK);
  }
  if (sad) {                                          // frown
    display.drawLine(cx - 6, cy + 10, cx, cy + 7, SSD1306_BLACK);
    display.drawLine(cx, cy + 7, cx + 6, cy + 10, SSD1306_BLACK);
  } else {                                            // smile
    display.drawLine(cx - 6, cy + 7, cx, cy + 10, SSD1306_BLACK);
    display.drawLine(cx, cy + 10, cx + 6, cy + 7, SSD1306_BLACK);
  }
  if (pet.asleep) {
    display.setCursor(cx + 28, cy - 20);
    display.print("z Z");
  }
}

void drawScreen() {
  display.clearDisplay();
  display.setTextSize(1);
  display.setTextColor(SSD1306_WHITE);
  drawBar(0, "F", pet.food);
  drawBar(43, "J", pet.fun);
  drawBar(86, "E", pet.energy);
  drawPet();
  display.setCursor(0, 56);
  if (millis() < msgUntil) {
    display.print(msg);
  } else {
    display.print("Age ");
    display.print(pet.ageMin / 60);
    display.print("h");
  }
  display.display();
}

void setup() {
  for (uint8_t i = 0; i < 3; i++) pinMode(buttons[i].pin, INPUT_PULLUP);
  if (!display.begin(SSD1306_SWITCHCAPVCC, OLED_ADDR)) {
    for (;;) {}                     // screen not found: check wiring and address
  }
  loadPet();
  display.dim(pet.asleep);
  say("Hello!");
}

void loop() {
  unsigned long now = millis();
  if (pressed(buttons[0])) feed();
  if (pressed(buttons[1])) play();
  if (pressed(buttons[2])) toggleSleep();

  if (now - lastTick >= TICK_MS) { lastTick = now; tick(); }
  if (now - lastSave >= SAVE_MS) { lastSave = now; savePet(); }

  // blink for 150 ms, then wait 3 to 6 seconds
  if (!blinking && now - lastBlink > blinkGap) { blinking = true; lastBlink = now; }
  if (blinking && now - lastBlink > 150) {
    blinking = false;
    lastBlink = now;
    blinkGap = random(3000, 6000);
  }

  drawScreen();
  delay(30);
}
What you should see: the pet appears with "Hello!" at the bottom and three full-ish bars at the top. It blinks every few seconds. Press Feed and it says "Yum!" while the F bar grows. Press Sleep and the screen dims, the eyes close and "z Z" floats above its head. Press Sleep again to wake it.
How the code works, part by part
Real time with millis()
millis() counts the milliseconds since the board started. The loop checks whether
TICK_MS (60,000 ms, one minute) has passed. If so, it calls tick(), which lowers or raises
the stats. Nothing in the sketch blocks for long, so the buttons always respond at once.
Clamped stats
The stats are bytes from 0 to 100. addClamp() adds or subtracts and then keeps the result inside that
range. Without it, a byte at 1 minus 2 would wrap around to 255, and a starving pet would suddenly look full.
A face drawn with shapes
The pet is a white rounded rectangle with black eyes and a mouth drawn on top. Drawing in black on white is a cheap way to cut features out of a shape. There are no bitmaps, so it uses almost no flash and you can change the look by editing a few numbers. Our robot eyes OLED animation guide uses the same idea for larger, more expressive eyes.
Debounced buttons
A button contact bounces for a few milliseconds when pressed, which can look like several presses.
pressed() only accepts a change that has stayed the same for 20 ms. It returns true once per press, so
holding Feed does not empty the food bar into the pet.
Saving the pet: EEPROM on Uno, ESP32 and Pico
EEPROM is memory that keeps its data with the power off. The whole pet lives in one struct, so
EEPROM.put(0, pet) saves it and EEPROM.get(0, pet) loads it. The first byte is a marker,
0x51. If the marker is missing or a stat is above 100, the sketch knows the memory holds junk and starts a new pet.
The Uno has real EEPROM, rated for about 100,000 writes per byte. The ESP32 and Pico copy it into flash memory
instead. That is why the sketch calls EEPROM.begin() at the start and EEPROM.commit()
after each save on those boards. The
Arduino EEPROM library guide
covers get() and put() in more detail.
Saving every ten minutes, plus once at bedtime, is about 150 writes a day. That is gentle on both kinds of memory. Do not save on every loop: at 30 loops a second you would wear out the Uno's EEPROM in about an hour.
One limit to know: the board has no clock while it is off. If you unplug the pet overnight, it does not get hungrier in that time. It simply carries on from its last save. For a pet that ages while unplugged, an ESP32 can fetch the time over Wi-Fi with NTP, as shown in the ESP32 OLED clock with NTP time guide.
Make the pet your own
- Change the pace.
FOOD_DROP,FUN_DROPandENERGY_DROPset how fast it needs care. SetTICK_MSto 5000 while testing so a minute passes every 5 seconds. - Change the face. Edit the numbers in
drawPet(). Wider eyes, a smaller body or ears made withfillTriangle()all take one line each. - Use a picture. Draw a pet in any paint program, convert it with the free Image to Byte Array converter in the Adafruit GFX format, and show it with
drawBitmap(). - Design animated eyes. The OLED Robot Eyes Generator lets you try eye shapes and moods in the browser and gives you Arduino code to borrow from.
- Add a mini game. Make Play start a short game instead of adding joy at once. The one-button Arduino OLED game is a good fit.
A 3D printed case and battery power
An Arduino virtual pet only feels finished in a case. A simple box about 60 x 45 x 20 mm (2.4 x 1.8 x 0.8 inches) fits a 0.96 inch OLED module, three buttons and a Pico or a small ESP32 board. Print it in PLA at 0.2 mm layers. The lit area of a 0.96 inch screen is about 22 x 11 mm, so cut a window of about 24 x 13 mm, and push the buttons through 6.5 mm holes.
For battery power, an ESP32 or Pico board with a LiPo charger is the tidy choice. The Uno draws too much to last long on batteries. The OLED itself takes more current when many pixels are lit, so the sleep mode's dim screen helps. Our OLED power consumption and battery life guide shows how to estimate run time.
Troubleshooting the OLED virtual pet
- Problem: the screen stays black. Why: the sketch stops in
setup()if it cannot find the screen. Fix: check VCC, GND, SDA and SCL, then try 0x3D forOLED_ADDR. The SSD1306 blank screen fix walks through every cause. - Problem: a button acts as if always pressed. Why: the two legs you used are joined inside the button. Fix: move one wire to the leg on the opposite corner.
- Problem: the pet resets to new every time you plug it in. Why: on an ESP32 or Pico,
EEPROM.commit()never ran, or the board was unplugged before the first save. Fix: press Sleep twice to force a save, then unplug and test again. - Problem: the stats never seem to change. Why: one tick is a whole minute. Fix: set
TICK_MSto 5000 while testing. - Problem: the picture is shifted or has noise on the right. Why: the screen is a 1.3 inch SH1106, not an SSD1306. Fix: use the Adafruit SH110X library, as explained in SH1106 vs SSD1306.
- Problem: the Uno freezes when you add more text or bitmaps. Why: the screen buffer takes half of the Uno's 2 KB of RAM. Fix: wrap text in
F()and keep bitmaps inPROGMEM, as the Uno memory limits guide explains. - Problem: no sound on the ESP32. Why: an old esp32 core without
tone(), or an active buzzer. Fix: update the esp32 core in Boards Manager and use a passive buzzer.
Next steps
Once the pet works, give it a personality. The ESP32 desk robot with OLED eyes and touch moods swaps buttons for touch pads, which feels more like petting. You could also add a splash screen with its name using the OLED logo splash screen guide. It makes a fun handmade holiday gift.
Frequently asked questions
How do you make a virtual pet with Arduino?
Connect an SSD1306 OLED and three buttons to an Arduino. Then run a sketch that keeps food, joy and energy numbers and lowers them over time with millis(). Button presses raise them, and the face changes with the numbers.
Can an Arduino Uno run a virtual pet?
Yes. The sketch in this guide fits on an Uno. The 128x64 screen buffer uses 1 KB of the Uno's 2 KB of RAM, so keep extra text in F() and bitmaps in PROGMEM if you add more.
How does the pet remember its stats when unplugged?
It saves its stats to EEPROM every ten minutes and when it goes to sleep, then loads them at startup. On ESP32 and Pico the sketch also calls EEPROM.begin() and EEPROM.commit(), because their EEPROM is stored in flash.
Does the pet get hungry while the board is off?
No. The board has no clock while it is unpowered, so the pet carries on from its last save. An ESP32 can read the real time from the internet with NTP if you want it to age while off.
Will this work on a 1.3 inch SH1106 OLED?
Not with the Adafruit SSD1306 library as it is. Use the Adafruit SH110X library, change the display object to Adafruit_SH1106G and use SH110X_WHITE and SH110X_BLACK. The pet logic stays the same.
Related guides
- Arduino OLED game: one-button runner on an SSD1306
- Arduino OLED robot eyes: animated eyes code
- ESP32 desk robot with OLED eyes and touch moods
- Arduino OLED menu with buttons
- Arduino OLED display tutorial (I2C SSD1306)
Free tools: Lithophane Maker for flat, curved, heart, round and cylinder lamp lithophanes, the Shadow Box Lamp Generator for wall shadow lamps, Text to STL for names and keychains, and 3MF to Web to show your prints on a website. See all tools.