Arduino OLED game: build a one-button runner on an SSD1306
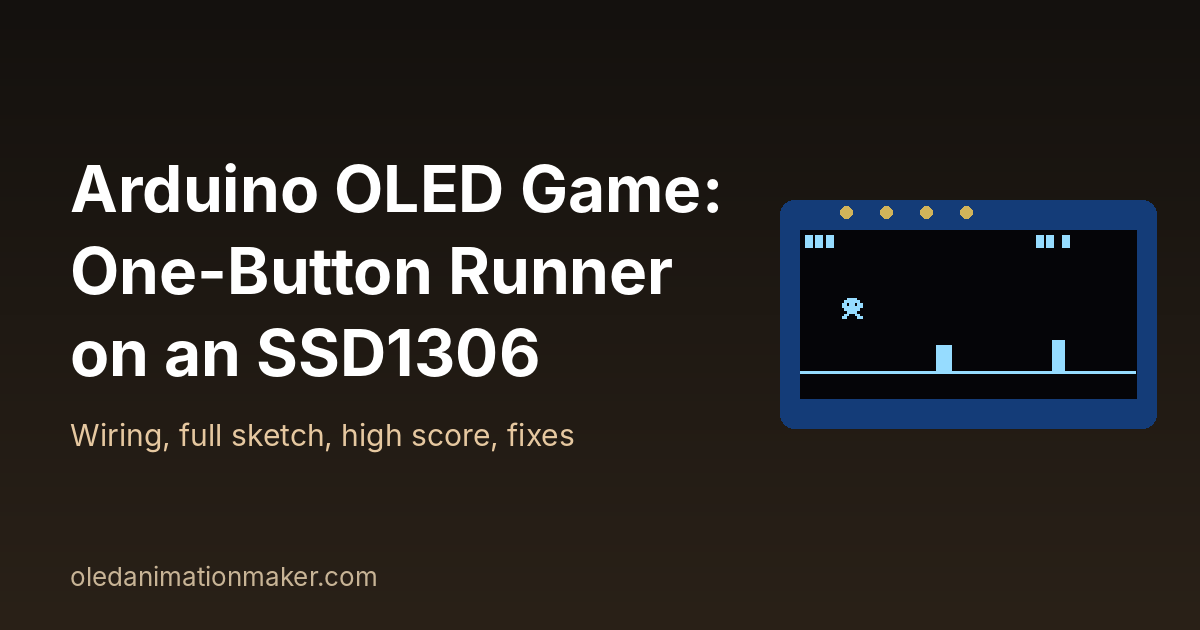
This guide shows you how to build an Arduino OLED game with just two parts: a 0.96 inch SSD1306 screen and one push button. You press the button to jump over blocks that scroll toward you. The game gets faster as you go, beeps when you jump, and remembers your best score after you unplug it. The same sketch runs on an Arduino Uno, an ESP32 or a Raspberry Pi Pico.
Tiny keychain game consoles built on the Pico 2 W and small ESP32 boards are a popular maker build this fall. This project is the core of one of those, kept simple enough to finish in an evening.
Quick answer. Wire the SSD1306 to your board's I2C pins and a button between one pin and GND.
Install Adafruit SSD1306 and Adafruit GFX, then upload the sketch below. It runs a game loop about 30 times a second
with millis(), moves the player with simple gravity, checks for hits with rectangles and saves the high
score in EEPROM.
What you need for this Arduino OLED game
| Part | Notes | Rough price (US) |
|---|---|---|
| Board | Arduino Uno or Nano, any ESP32 dev board, or a Raspberry Pi Pico / Pico 2 | $5 to $28 |
| OLED | 0.96 inch SSD1306, 128x64, I2C (4 pins) | $4 to $8 |
| Push button | Any 6 mm or 12 mm tactile button | Under $1 |
| Passive buzzer | Optional, for jump and crash sounds | Under $1 |
| Breadboard and jumper wires | For testing before you solder | $5 |
A passive buzzer is one that needs a changing signal to make a sound. That is what tone() sends, so you
can play different notes. An active buzzer only makes one fixed beep. If you have never used this screen before, the
Arduino OLED display tutorial for the SSD1306 covers
the basics in more detail.
Wiring the OLED and the button
I2C is the two-wire bus the screen talks on. SDA carries the data and SCL carries the clock. Each board has default pins for it, and the sketch uses those defaults so you do not need to set them in code.
| Connection | Arduino Uno / Nano | ESP32 dev board | Raspberry Pi Pico |
|---|---|---|---|
| OLED VCC | 5V | 3V3 | 3V3(OUT), pin 36 |
| OLED GND | GND | GND | GND |
| OLED SDA | A4 | GPIO 21 | GP4 |
| OLED SCL | A5 | GPIO 22 | GP5 |
| Button (other leg to GND) | D2 | GPIO 13 | GP15 |
| Buzzer + (other leg to GND) | D8 | GPIO 25 | GP14 |
The button needs no resistor. The sketch turns on the board's internal pull-up resistor, which holds the pin HIGH. Pressing the button connects the pin to GND, so it reads LOW. Use two legs on opposite sides of a four-leg tactile button, or test with a multimeter first. Two legs on the same side are often joined inside, and the button then reads as always pressed.
Most SSD1306 modules sold on Amazon US have a voltage regulator and work from 3.3 V or 5 V. Check your module's listing if you are not sure.
Install the libraries
- Open the Arduino IDE and go to Sketch → Include Library → Manage Libraries.
- Search for Adafruit SSD1306 and click Install.
- When it asks to install dependencies, click Install All. This adds the Adafruit GFX Library, which has the drawing functions.
- For ESP32, add the Espressif esp32 core in Boards Manager. For the Pico, add Earle Philhower's Raspberry Pi Pico/RP2040 core.
EEPROM and Wire come with every board core, so there is nothing else to install. The official Adafruit SSD1306 library on GitHub lists every function if you want to go further.
The complete SSD1306 game sketch
Copy the whole sketch into a new file. The lines you may need to change are marked with comments near the top: the
OLED address and the pin numbers. The #if lines pick the right pins for your board automatically when
you compile.
// One-button OLED runner game for SSD1306 128x64 (I2C)
// Boards: Arduino Uno/Nano, ESP32, Raspberry Pi Pico (arduino-pico core)
#include <Wire.h>
#include <Adafruit_GFX.h>
#include <Adafruit_SSD1306.h>
#include <EEPROM.h>

#define SCREEN_W 128
#define SCREEN_H 64
#define OLED_ADDR 0x3C          // change to 0x3D if your module uses it

// ---- Pins: change these to match your wiring ----
#if defined(ESP32)
const uint8_t BUTTON_PIN = 13;  // ESP32-C3 SuperMini: use 3
const uint8_t BUZZER_PIN = 25;  // ESP32-C3 SuperMini: use 4
#elif defined(ARDUINO_ARCH_RP2040)
const uint8_t BUTTON_PIN = 15;  // GP15
const uint8_t BUZZER_PIN = 14;  // GP14
#else
const uint8_t BUTTON_PIN = 2;   // Uno / Nano D2
const uint8_t BUZZER_PIN = 8;   // Uno / Nano D8
#endif
const bool USE_BUZZER = true;   // set to false if you have no buzzer

Adafruit_SSD1306 display(SCREEN_W, SCREEN_H, &Wire, -1);

// 8x8 player sprite, 1 = lit pixel (Adafruit drawBitmap format)
const unsigned char PROGMEM playerBmp[] = {
  0b00111100,
  0b01111110,
  0b11011011,
  0b11111111,
  0b01111110,
  0b00111100,
  0b01100110,
  0b11000011
};

// ---- Game tuning ----
const int GROUND_Y = 54;          // y of the ground line
const int PLAYER_X = 16;
const int PLAYER_SIZE = 8;
const float GRAVITY = 0.6;        // bigger = falls faster
const float JUMP_SPEED = -6.0;    // more negative = jumps higher
const float START_SPEED = 2.0;    // pixels per frame
const float MAX_SPEED = 5.0;
const unsigned long FRAME_MS = 33; // about 30 frames per second
const uint8_t MAX_OBS = 3;

enum State { TITLE, PLAYING, GAME_OVER };
State state = TITLE;

float playerY, velY;
bool onGround;
float obsX[MAX_OBS];
uint8_t obsW[MAX_OBS], obsH[MAX_OBS];
float speed;
uint32_t frames, score, best;
unsigned long lastFrame = 0, gameOverAt = 0;

// ---- Button with debounce ----
bool lastReading = HIGH, stableState = HIGH, pressLatched = false;
unsigned long lastChange = 0;

void pollButton() {
  bool reading = digitalRead(BUTTON_PIN);
  if (reading != lastReading) {
    lastChange = millis();
    lastReading = reading;
  }
  if (millis() - lastChange > 15 && reading != stableState) {
    stableState = reading;
    if (stableState == LOW) pressLatched = true;   // pressed (wired to GND)
  }
}

bool takePress() {
  bool p = pressLatched;
  pressLatched = false;
  return p;
}

void beep(unsigned int freq, unsigned long ms) {
  if (USE_BUZZER) tone(BUZZER_PIN, freq, ms);
}

// ---- High score in EEPROM (byte 0 = marker, bytes 1-4 = score) ----
void loadBest() {
#if defined(ESP32) || defined(ESP8266) || defined(ARDUINO_ARCH_RP2040)
  EEPROM.begin(16);
#endif
  if (EEPROM.read(0) == 0x42) EEPROM.get(1, best);
  else best = 0;
}

void saveBest() {
  EEPROM.write(0, 0x42);
  EEPROM.put(1, best);
#if defined(ESP32) || defined(ESP8266) || defined(ARDUINO_ARCH_RP2040)
  EEPROM.commit();
#endif
}

// ---- Obstacles ----
int minGap() {
  return (int)(speed * 20) + 12;  // 20 frames in the air, plus room to land
}

void spawnObstacle(uint8_t i, float x) {
  obsX[i] = x;
  obsW[i] = random(4, 9);         // 4 to 8 px wide
  obsH[i] = random(6, 15);        // 6 to 14 px tall
}

void resetGame() {
  playerY = GROUND_Y - PLAYER_SIZE;
  velY = 0;
  onGround = true;
  speed = START_SPEED;
  frames = 0;
  score = 0;
  float x = SCREEN_W + 10;
  for (uint8_t i = 0; i < MAX_OBS; i++) {
    spawnObstacle(i, x);
    x += minGap() + random(0, 40);
  }
}

// ---- One frame of game logic ----
void updateGame(bool pressed) {
  if (pressed && onGround) {
    velY = JUMP_SPEED;
    onGround = false;
    beep(880, 25);
  }
  velY += GRAVITY;
  playerY += velY;
  if (playerY >= GROUND_Y - PLAYER_SIZE) {
    playerY = GROUND_Y - PLAYER_SIZE;
    velY = 0;
    onGround = true;
  }

  float farthest = 0;
  for (uint8_t i = 0; i < MAX_OBS; i++) {
    obsX[i] -= speed;
    if (obsX[i] > farthest) farthest = obsX[i];
  }
  for (uint8_t i = 0; i < MAX_OBS; i++) {
    if (obsX[i] + obsW[i] < 0) {
      float x = farthest + minGap() + random(0, 40);
      if (x < SCREEN_W) x = SCREEN_W;
      spawnObstacle(i, x);
      farthest = x;
    }
  }

  // Collision: shrink the player box by 1 px so near misses feel fair
  int px = PLAYER_X + 1, py = (int)playerY + 1, ps = PLAYER_SIZE - 2;
  for (uint8_t i = 0; i < MAX_OBS; i++) {
    int ox = (int)obsX[i], oy = GROUND_Y - obsH[i];
    if (px < ox + obsW[i] && px + ps > ox && py < oy + obsH[i] && py + ps > oy) {
      state = GAME_OVER;
      gameOverAt = millis();
      beep(220, 300);
      if (score > best) {
        best = score;
        saveBest();
      }
      return;
    }
  }

  frames++;
  score = frames / 5;                        // about 6 points per second
  speed = START_SPEED + score * 0.01;        // slowly speeds up
  if (speed > MAX_SPEED) speed = MAX_SPEED;
}

// ---- Drawing ----
void drawGame() {
  display.clearDisplay();
  display.drawFastHLine(0, GROUND_Y, SCREEN_W, SSD1306_WHITE);
  display.drawBitmap(PLAYER_X, (int)playerY, playerBmp, 8, 8, SSD1306_WHITE);
  for (uint8_t i = 0; i < MAX_OBS; i++) {
    display.fillRect((int)obsX[i], GROUND_Y - obsH[i], obsW[i], obsH[i], SSD1306_WHITE);
  }
  display.setTextSize(1);
  display.setCursor(0, 0);
  display.print(score);
  display.setCursor(80, 0);
  display.print(F("HI "));
  display.print(best);
  display.display();
}

void drawCentered(const __FlashStringHelper *text, int y, uint8_t size) {
  display.setTextSize(size);
  int w = strlen_P((const char *)text) * 6 * size;
  display.setCursor((SCREEN_W - w) / 2, y);
  display.print(text);
}

void drawTitle() {
  display.clearDisplay();
  drawCentered(F("OLED RUN"), 8, 2);
  drawCentered(F("Press to start"), 36, 1);
  display.setCursor(34, 50);
  display.print(F("Best: "));
  display.print(best);
  display.display();
}

void drawGameOver() {
  display.clearDisplay();
  drawCentered(F("GAME OVER"), 6, 2);
  display.setTextSize(1);
  display.setCursor(30, 30);
  display.print(F("Score: "));
  display.print(score);
  display.setCursor(30, 40);
  display.print(F("Best:  "));
  display.print(best);
  drawCentered(F("Press to retry"), 54, 1);
  display.display();
}

void setup() {
  Serial.begin(115200);
  pinMode(BUTTON_PIN, INPUT_PULLUP);    // button between pin and GND
  Wire.begin();                         // default I2C pins of your board
  if (!display.begin(SSD1306_SWITCHCAPVCC, OLED_ADDR)) {
    Serial.println(F("SSD1306 not found. Check wiring and address."));
    for (;;) {}
  }
  display.setTextColor(SSD1306_WHITE);
  loadBest();
  drawTitle();
}

void loop() {
  pollButton();                          // check the button every loop
  if (millis() - lastFrame < FRAME_MS) return;
  lastFrame = millis();
  bool pressed = takePress();

  if (state == TITLE) {
    if (pressed) {
      randomSeed(micros());              // press timing makes a good seed
      resetGame();
      state = PLAYING;
    }
  } else if (state == PLAYING) {
    updateGame(pressed);
    if (state == PLAYING) drawGame();
    else drawGameOver();
  } else {                               // GAME_OVER
    if (pressed && millis() - gameOverAt > 600) {
      resetGame();
      state = PLAYING;
    }
  }
}
What you should see: the title "OLED RUN" with "Press to start" and your best score. Press the button and a small character appears on the left above a ground line, with blocks scrolling in from the right. Your score counts up in the top left corner, next to your best score on the right. Hit a block and the game over screen appears, ready for another round.
How the game code works
Almost every small game uses the same pattern. You read input, update the game, then draw one frame. Once you understand these four parts, you can build Pong, Snake or a space shooter the same way.
The game loop and frame timing
loop() runs thousands of times a second, but the game only moves once every 33 ms. That is about 30
frames per second. The check millis() - lastFrame < FRAME_MS skips the rest of the loop until it is
time for the next frame. This keeps the speed steady on fast and slow boards alike.
Avoid delay() for this. While a delay runs, the board cannot read the button, so short presses get lost.
With millis(), the sketch calls pollButton() on every pass of the loop. A press is stored as
a flag and used in the next frame.
On an Uno, sending the full screen over I2C is the slowest step. The library speeds the bus up to 400 kHz while it
sends, but it still uses a large part of each frame. That is why the sketch calls display.display()
only once per frame. ESP32 and Pico boards finish the same work with time to spare.
Reading the button without double jumps
Mechanical buttons "bounce". The metal contacts flicker on and off for a few milliseconds when you press them. The code only accepts a new state after the pin has stayed the same for 15 ms. It counts a press only on the change from HIGH to LOW. Holding the button down therefore gives one jump, not one jump per frame.
Jump physics in three lines
The player has a position playerY and a vertical speed velY. A jump sets
velY to -6, which moves the player up because y counts down from the top of the screen. Every frame,
gravity adds 0.6 to the speed, and the speed is added to the position. The player rises, slows, stops and falls
back down, just like a real jump.
With these numbers a jump is about 30 pixels high and lasts about 20 frames. The tallest block is 14 pixels, so
every block can be cleared. The minGap() function spaces the blocks at least 20 frames of travel apart.
This keeps the game fair even at full speed, because you always have room to land before the next jump.
Collision checks with rectangles
Each block and the player are treated as rectangles. Two rectangles overlap when each one starts before the other
ends, on both the x and y axes. That is the long if line in updateGame(). The player's
box is shrunk by one pixel on each side. Without this, a hit that only touches a corner feels unfair, because the
sprite has empty pixels at its corners.
Saving the high score in EEPROM
EEPROM is a small memory that keeps its contents when the power is off. The sketch writes a marker byte at address 0 and the 4-byte best score at addresses 1 to 4. On first boot the marker is missing, so the best score starts at zero instead of a random value.
The Uno has real EEPROM. The ESP32 and Pico copy it into flash memory instead. That is why the sketch calls
EEPROM.begin() and EEPROM.commit() on those boards. The
Arduino EEPROM library guide
covers get() and put() in more detail. The score is only saved when you beat it, so the memory is not worn out by constant
writes.
Make the game your own
The player is an 8x8 bitmap in the playerBmp array. Each line is one row of pixels, and each 1 is a lit
pixel. You can edit it by hand, or draw a sprite in any paint program and convert it with the free
Image to Byte Array converter. Choose Custom size, set 8 by 8
(or 16 by 16), and pick the Adafruit GFX drawBitmap format. If you make the sprite bigger, change
PLAYER_SIZE and the two 8s in the drawBitmap() call.
For a two-frame running animation, make two bitmaps and swap them every few frames with
(frames / 4) % 2. The guide to
converting an image to a byte array for an OLED
walks through the conversion step by step. For blocks, clouds or a moon in the background, the
guide to drawing OLED shapes with drawCircle and drawRect
lists every shape function.
| Setting | Default | Change it to |
|---|---|---|
GRAVITY | 0.6 | 0.4 for floaty jumps, 0.8 for snappy ones |
JUMP_SPEED | -6.0 | -7.0 to jump higher; keep jumps taller than the tallest block |
START_SPEED | 2.0 | 1.5 for young kids, 3.0 for a hard start |
MAX_SPEED | 5.0 | 6.0 or more for expert mode |
FRAME_MS | 33 | 25 on ESP32 or Pico for smoother motion |
If you change gravity or jump speed, keep minGap() in step. The number 20 in it is the time in the air,
which is two times the jump speed divided by gravity.
Turn it into a pocket or keychain game
To carry the game around, move it to a small board and a battery. A good choice is an ESP32-C3 SuperMini or a Pico with a 3.7 V LiPo cell, a USB-C charger module and a slide switch.
- ESP32-C3 SuperMini: its default I2C pins are GPIO 8 (SDA) and GPIO 9 (SCL). It has no GPIO 13 or 25, so use GPIO 3 for the button and GPIO 4 for the buzzer, as the comments in the sketch say.
- Power: connect the battery, through the charger module and switch, to VSYS on a Pico or to the 5V pin on an ESP32-C3 SuperMini. The board's own regulator makes 3.3 V, and the OLED runs from its 3V3 pin.
- Battery life: a game screen is mostly black, which helps, because an OLED only uses power for lit pixels. The guide to OLED power consumption and battery life shows how to estimate run time.
- Case: print a two-part case in PLA with a window for the screen and a hole above the button. Add a loop for a keyring if you like.
No hardware yet? You can try the sketch in a browser first. The Wokwi SSD1306 simulator guide shows how to add an OLED and a button to a virtual Uno.
Troubleshooting the Arduino OLED game
- Problem: the screen stays black. Why: wrong wiring or the wrong I2C address. Fix: check SDA and SCL are not swapped, open the Serial Monitor at 115200 baud, and try
0x3Das the address. The SSD1306 blank screen fix guide has an I2C scanner sketch. - Problem: the game starts by itself or the player jumps nonstop. Why: the button reads LOW all the time. Fix: move the button so its two legs are on opposite sides, and check it goes to GND, not 5V.
- Problem: jumps feel late or get missed. Why: a
delay()was added somewhere. Fix: remove it, and keeppollButton()as the first line ofloop(). - Problem: the image is shifted by two pixels or shows noise on the right. Why: the screen is a 1.3 inch SH1106, not an SSD1306. Fix: use the Adafruit SH110X library, as explained in the FAQ below.
- Problem: the Uno freezes or resets when you add more graphics. Why: the screen buffer takes half of the Uno's RAM. Fix: wrap text in
F()and keep bitmaps inPROGMEM. The Uno memory limits and PROGMEM guide explains why. - Problem: the high score resets after unplugging on ESP32 or Pico. Why: the data was never written to flash. Fix: make sure
EEPROM.commit()runs afterEEPROM.put(). - Problem: no sound from the buzzer. Why: it is an active buzzer, or the pin is wrong. Fix: use a passive buzzer, or set
USE_BUZZERto false.
Next steps
Once the runner works, try adding a second button for a duck move, or a menu to pick easy, normal and hard modes. The guide to building an Arduino OLED menu with buttons shows how. For a cleaner title screen, design a logo in the OLED Animation Maker and follow the OLED logo splash screen guide to show it at startup. The Adafruit GFX graphics guide lists every drawing and text function you can use in your next game.
Frequently asked questions
Can an Arduino Uno run a game on an OLED display?
Yes. An Uno can run simple games like a runner, Pong or Snake on a 128x64 SSD1306. The screen buffer uses 1,024 of its 2,048 bytes of RAM, so keep text in flash with F() and keep the game state small.
How fast can an SSD1306 OLED refresh for a game?
Over I2C at 400 kHz, sending the full 128x64 screen takes roughly 25 ms, so about 30 frames per second is a realistic target. ESP32 and Pico boards have more spare time for game logic than an Uno.
Why is my OLED game laggy?
Usually the code uses delay() for timing or reads the button only once per frame. Use millis() to time frames, check the button on every pass of loop(), and call display.display() only once per frame.
How do I save a high score on Arduino?
Store it in EEPROM with EEPROM.put() and read it back with EEPROM.get(). On ESP32 and Pico, call EEPROM.begin() first and EEPROM.commit() after writing, because their EEPROM is emulated in flash.
Will this game work on an SH1106 1.3 inch OLED?
Not with the Adafruit SSD1306 library as it is. Swap it for the Adafruit SH110X library, change the display type to Adafruit_SH1106G and use SH110X_WHITE. The game logic stays the same.
Related guides
- Arduino OLED display tutorial (I2C SSD1306)
- Arduino OLED menu with buttons
- Image to byte array for OLED sprites
- Robot eyes OLED animation on Arduino
- ESP32 desk robot with OLED eyes and touch moods
Free tools: Lithophane Maker for flat, curved, heart, round and cylinder lamp lithophanes, the Shadow Box Lamp Generator for wall shadow lamps, Text to STL for names and keychains, and 3MF to Web to show your prints on a website. See all tools.